Getting started with Teensy Development on PlatformIO on a remote Machine
Sometimes it is necessary to connect to a Teensy/Arduino via a remote host. May it be due to limiations in connectivity or because the chipset is not fully supported on your host OS but rather some linux variant that has the appropriate support out of the box. This guide will help you to understand how to connect to Teensy on PlatformIO and the additional steps being necessary to connect to it via a remote host.
Getting started
Get Visual Studio Code. It’s free and open source software created by Microsoft. This will then be the host application for PlatformIO.
If you want to develop on your host (i.e. your Mac, then only search on the Extensions Library (the icon with the four boxes) for PlatformIO and click install. This will install PlatformIO on your local environment and you can develop right away. Jump to [#usage](Using PlatformIO) to develop with PlatformIO.
Connect to remote host
Connecting to your remote host (may it be a virtual machine or RaspberryPi) via SSH is configured via an entry in .ssh/config on your host.
Host debian
  CanonicalDomains local
  CanonicalizeHostname yes
  LocalForward 127.0.0.1:8008 127.0.0.1:8008
  ForwardAgent yes
The above entry instructs to connect to Host debian and to connect to it independent on using ssh debian or ssh debian.local. It then instructs a LocalForward to forward the port 8008 to use in PlatformIO and I am additionally forwarding my agent as I would like to use my github Credentials to push the repository without transferring my ssh key.
The above assumes you’re using key based authentication on the remote host which you should always do.
UDEV Rules (Teensy)
Remember to set the correct UDEV rules on the remote host, as this is easily overlooked as it is now running on a separate machine. For teensy, you can find them at PJRC’s 00-teensy.rules. If you’re receiving a "Device found but unable to open" Error, it most likely means you forgot this step.
Set up VSCode
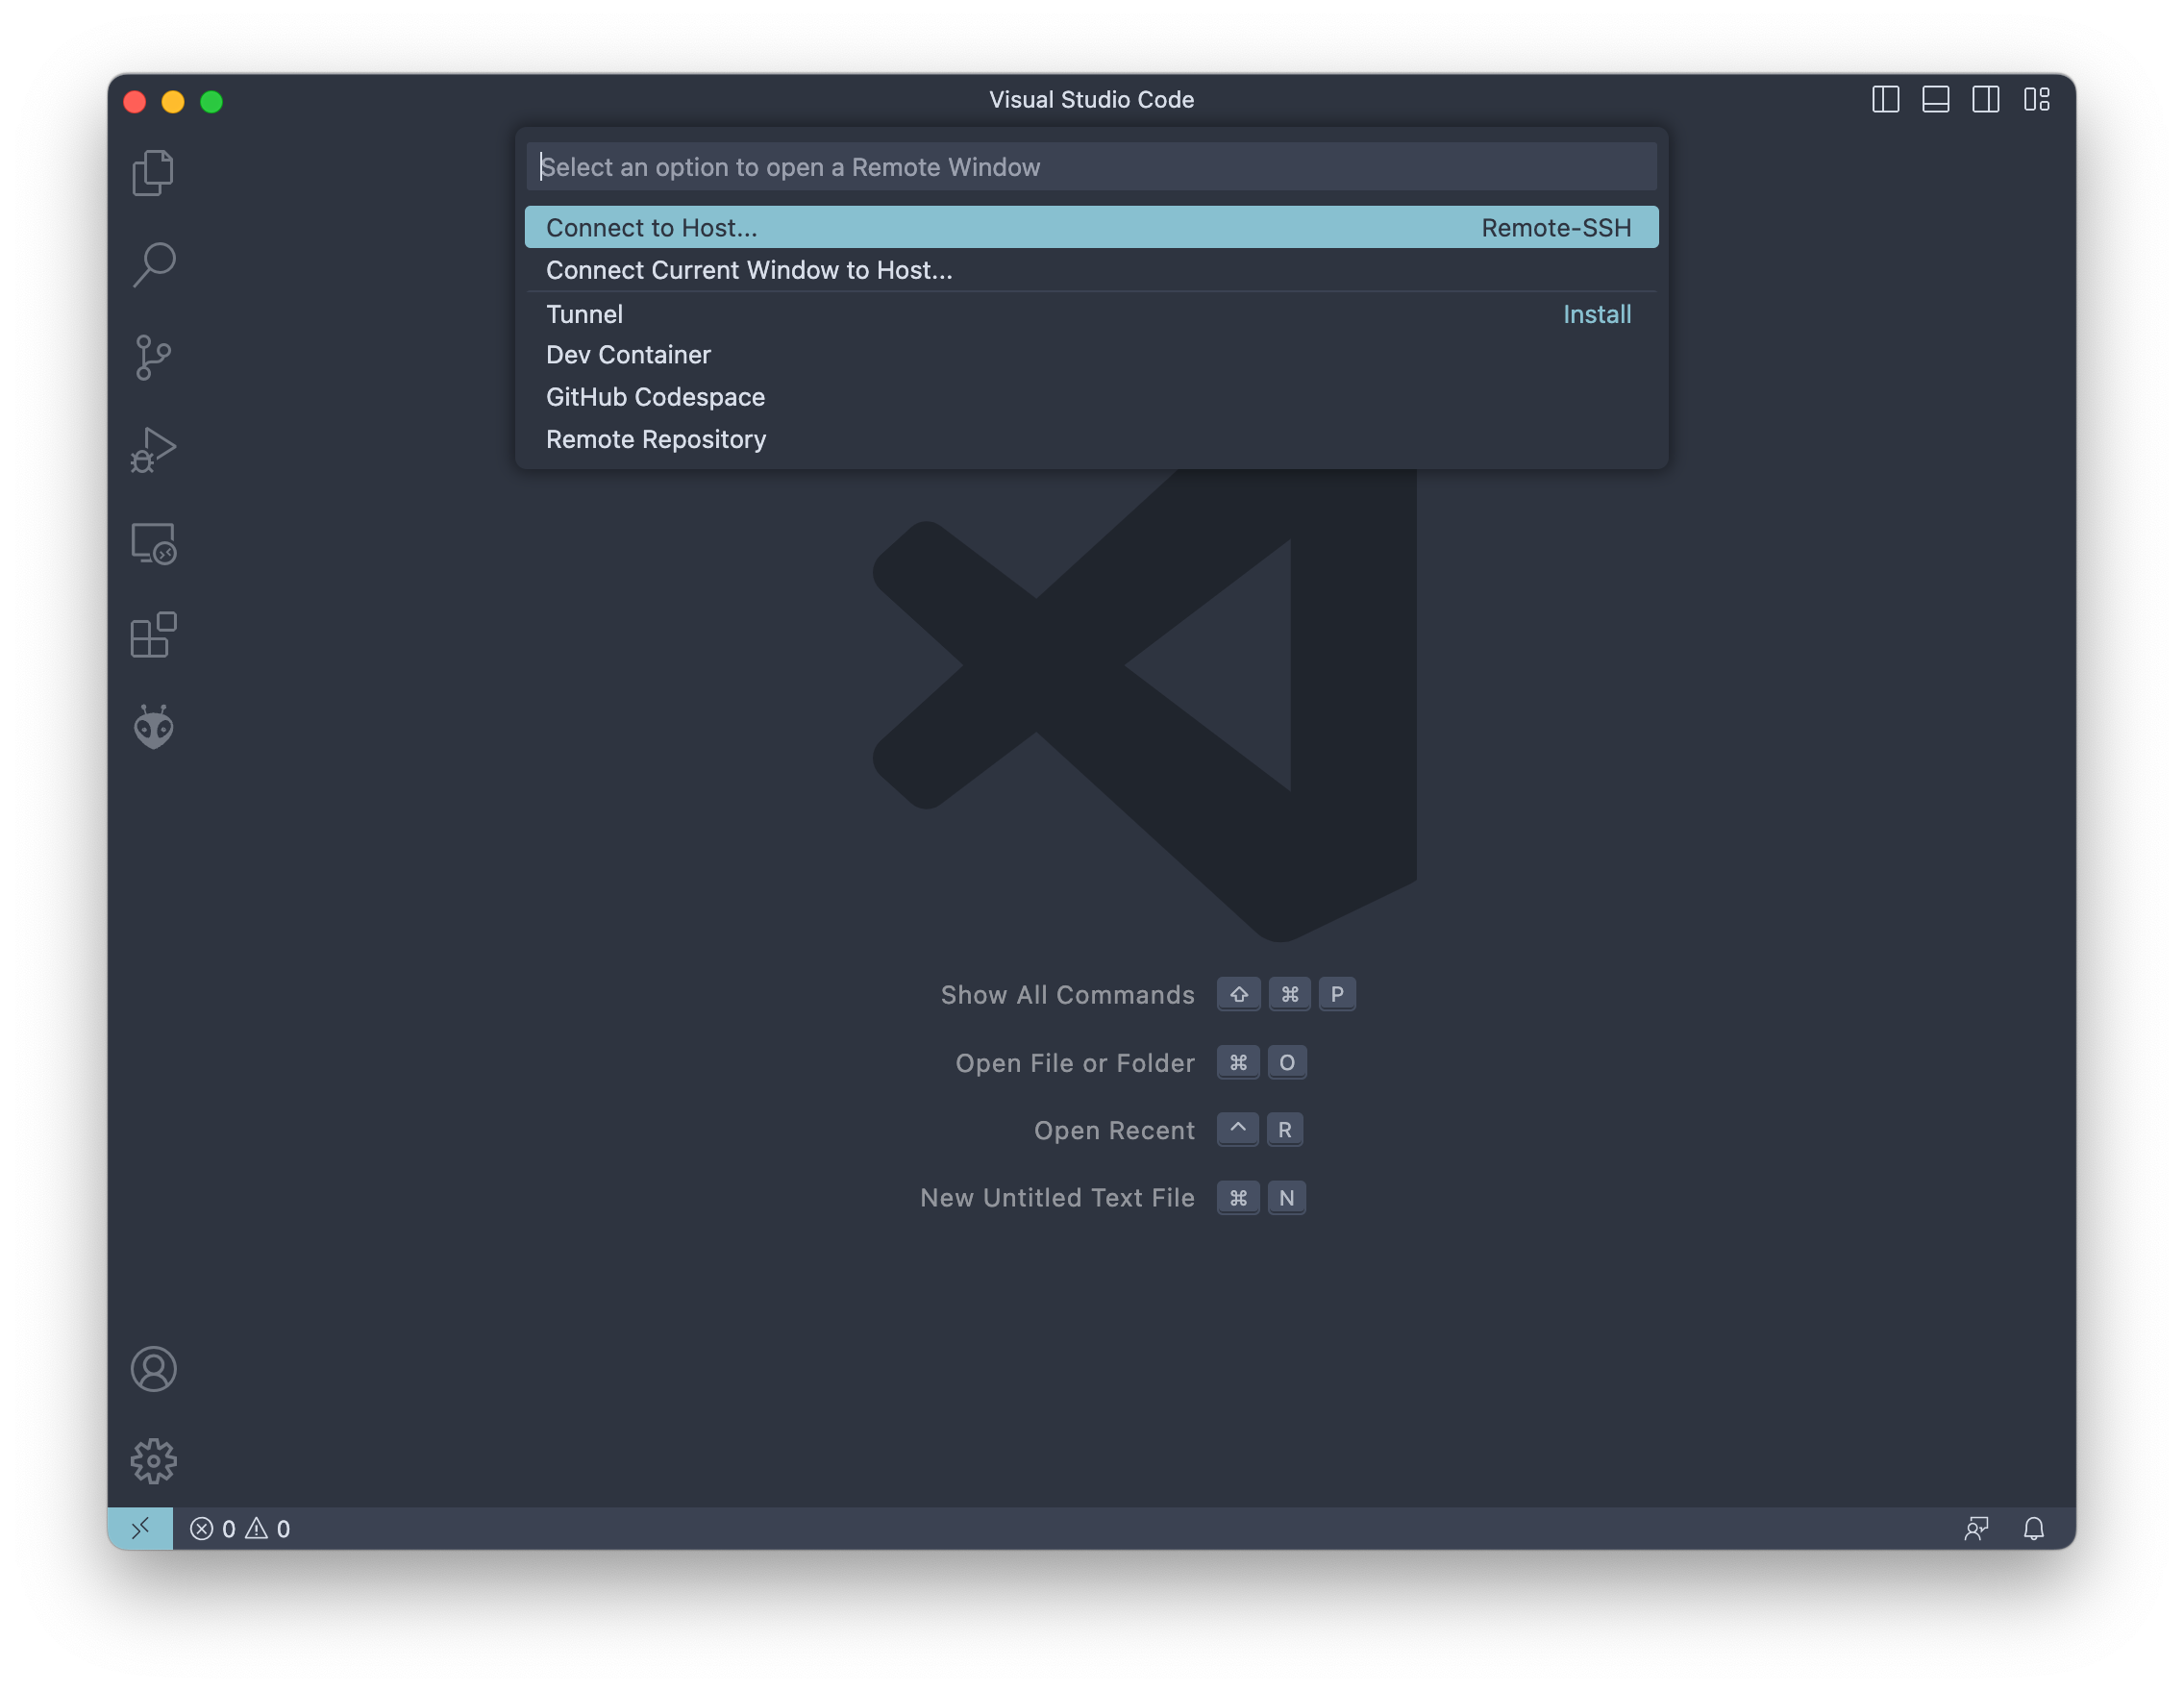
In Visual Studio Code (VSCode) then click the icon on the bottom bar, which will then ask you if you want to connect to Host/Tunnel etc. Choose Host and then select the appropriate host which will be fetched from your .ssh/config. This will then establish a connection to the remote host.
Once connected it will let you know at the bottom of the window:

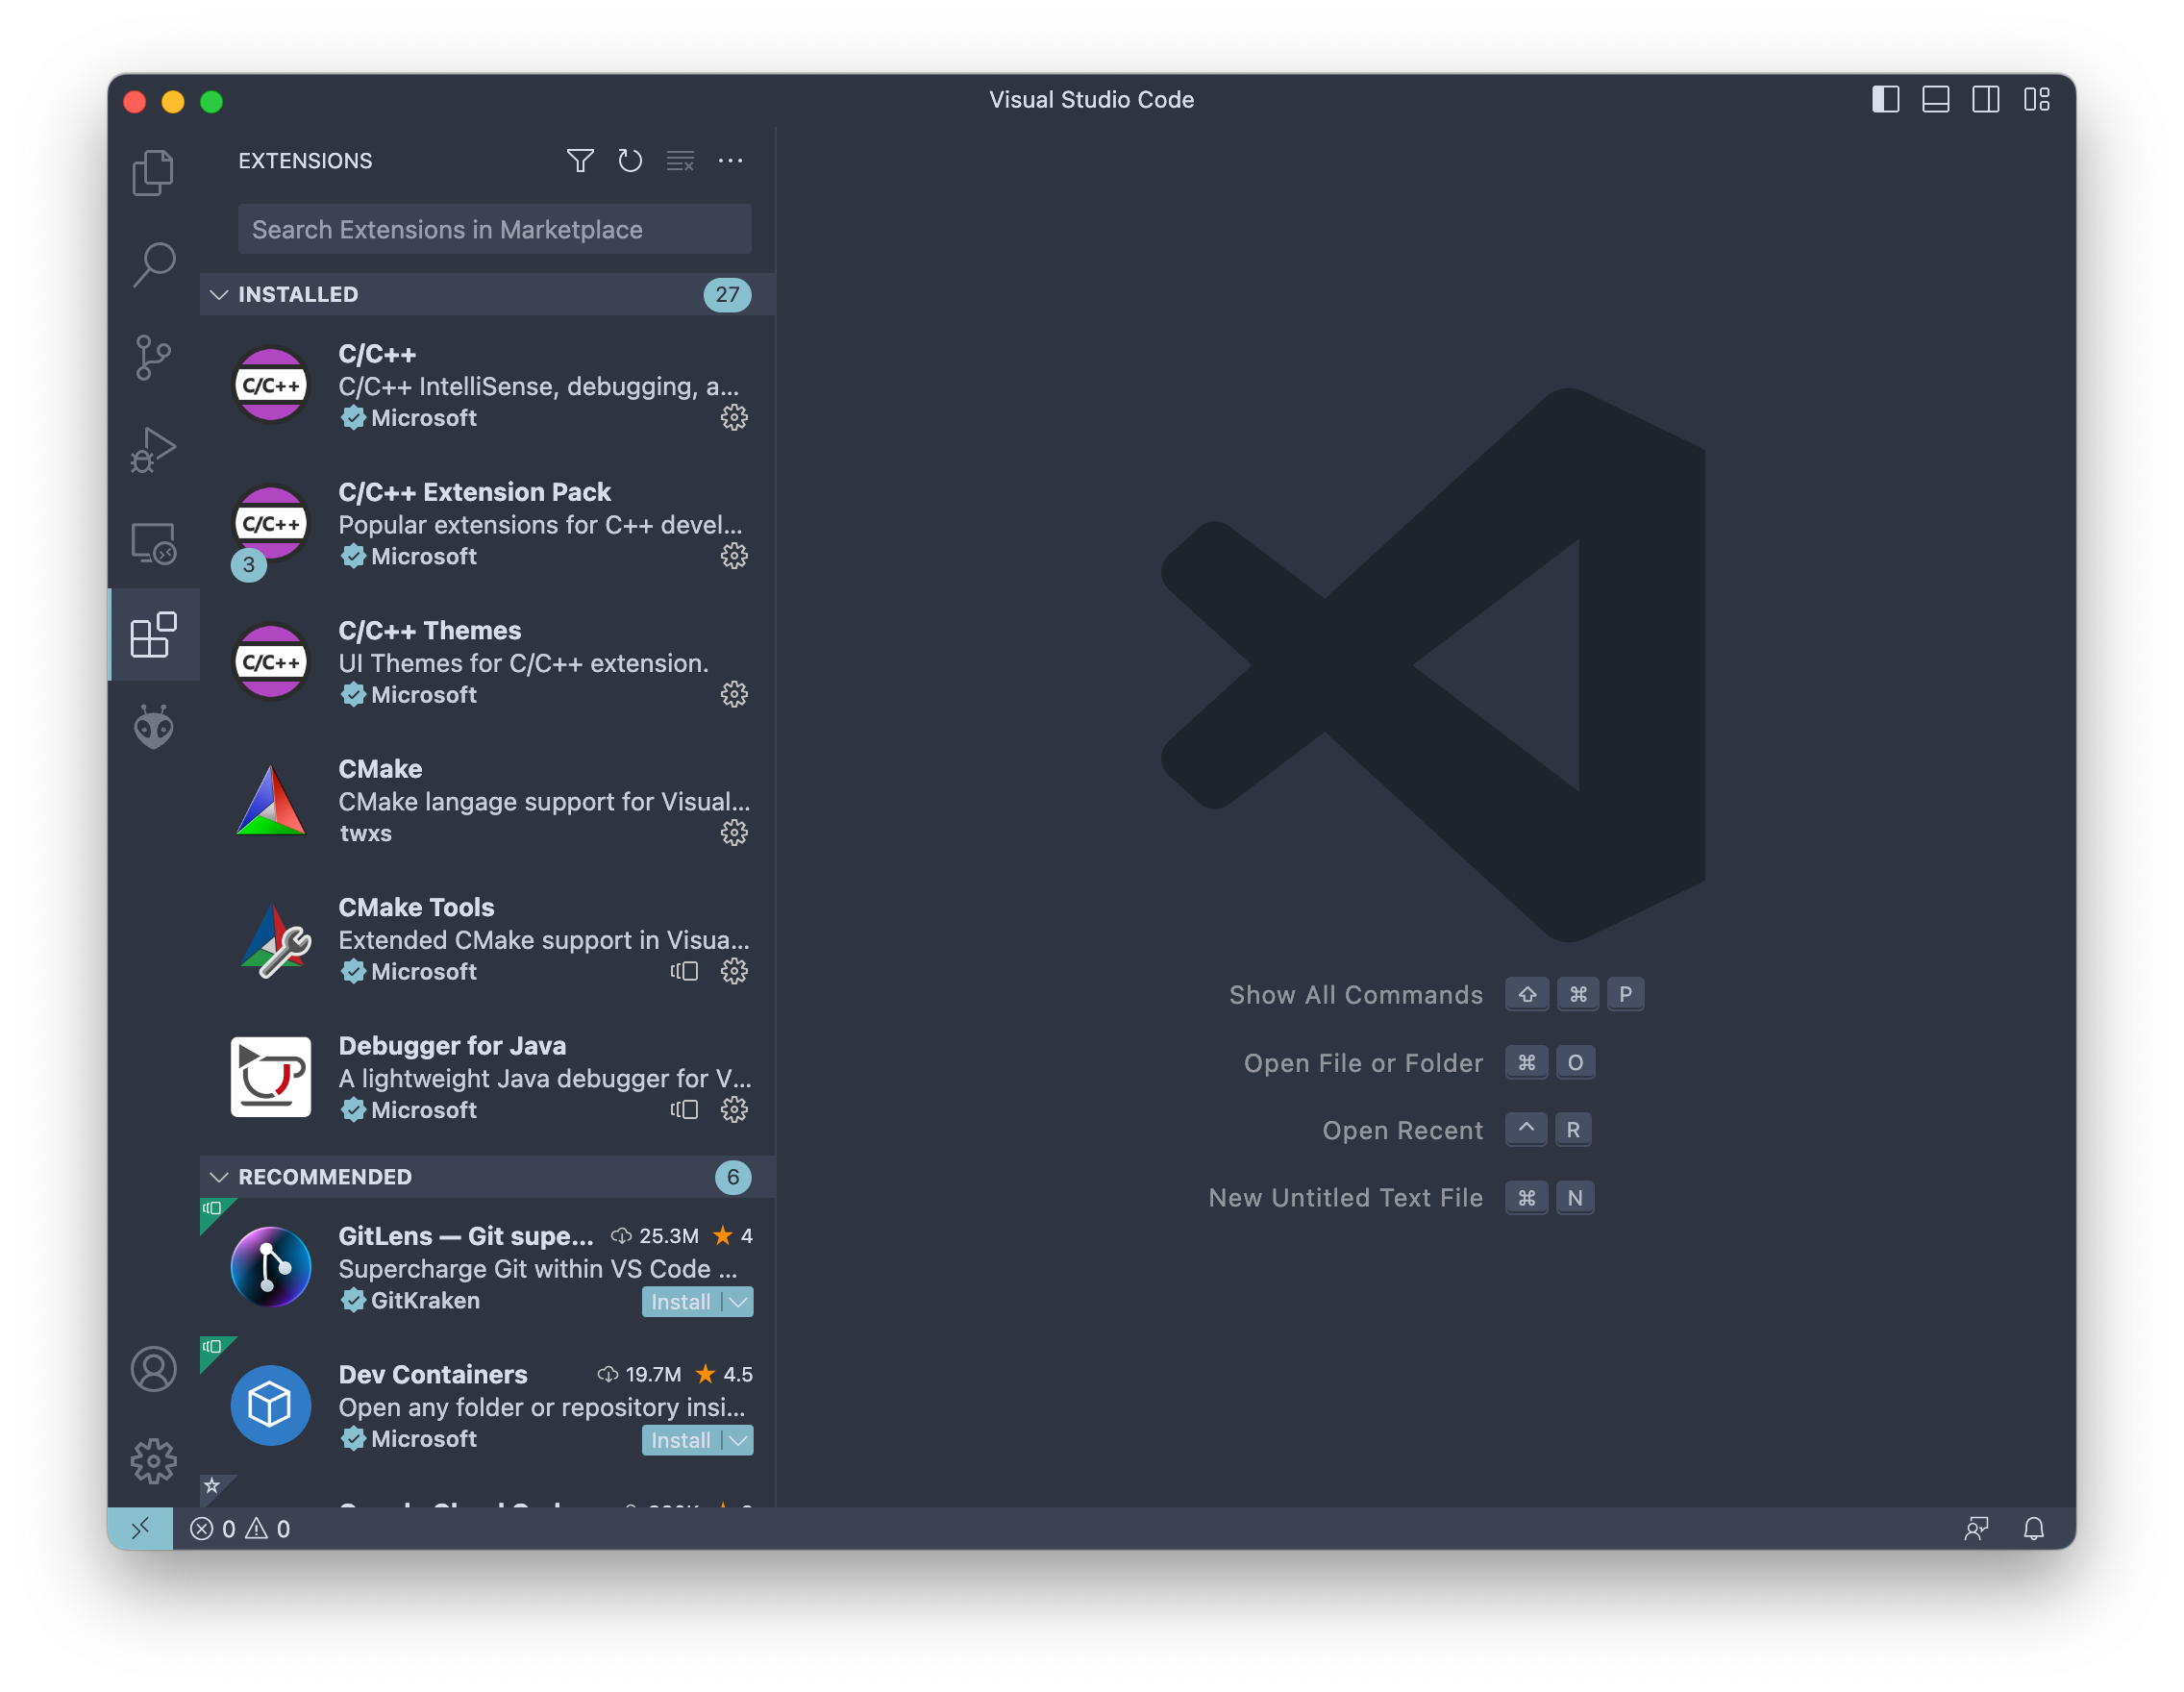
Go ahead and search on the Extensions Library (the icon with the four boxes) for PlatformIO and click install On SSH: <your Host>. This will install PlatformIO on your remote environment instead of the local environment.
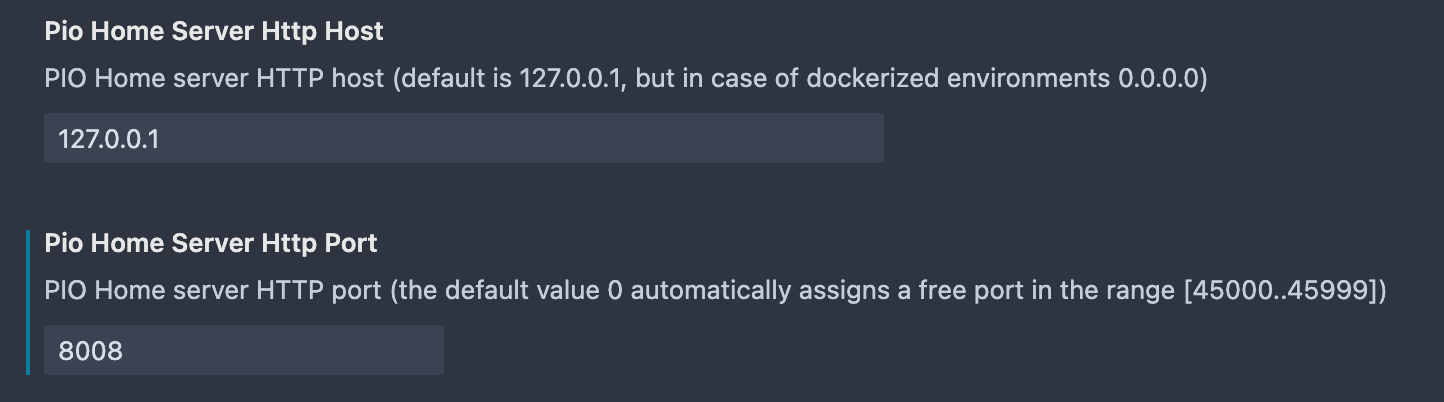
Before jumping into developing your code, there is one last step you should do, as PlatformIO (PIO) Home will not load and rather display a black screen. Remember the setting in our .ssh/config: LocalForward 127.0.0.1:8008 127.0.0.1:8008?
Go to VSCode Settings -> Extensions -> PlatformIO IDE and set the PIO Home Server Http Host to 127.0.0.1 and the PIO Home Server Http Port to 8008. Reconnect and you should see PIO Home in your remote VSCode.
Usage
Now that we set up everything, to create a new project in PlatformIO simply press on New Project on PIO Home. Select the board you want to use and it automatically creates the project with the appropriate settings for your board.
It is now time to explore the Project. The main.cpp file is underneath src, header files belong into includes. The lib folder is intended for private libraries which will be compiled by PlatformIO. test is self-explanatory and the last file remaining is the platformio.ini file located in the project’s root.
The platformio.ini file acts as our main configuration file and carries informations about the platform you’re developing for as well as informations about the board anf framework you’re using. You may also change the upload_protocol which I’ve set to teensy-cli for ease of use. The configuration file also also carries the library dependencies with their respective version numbers.
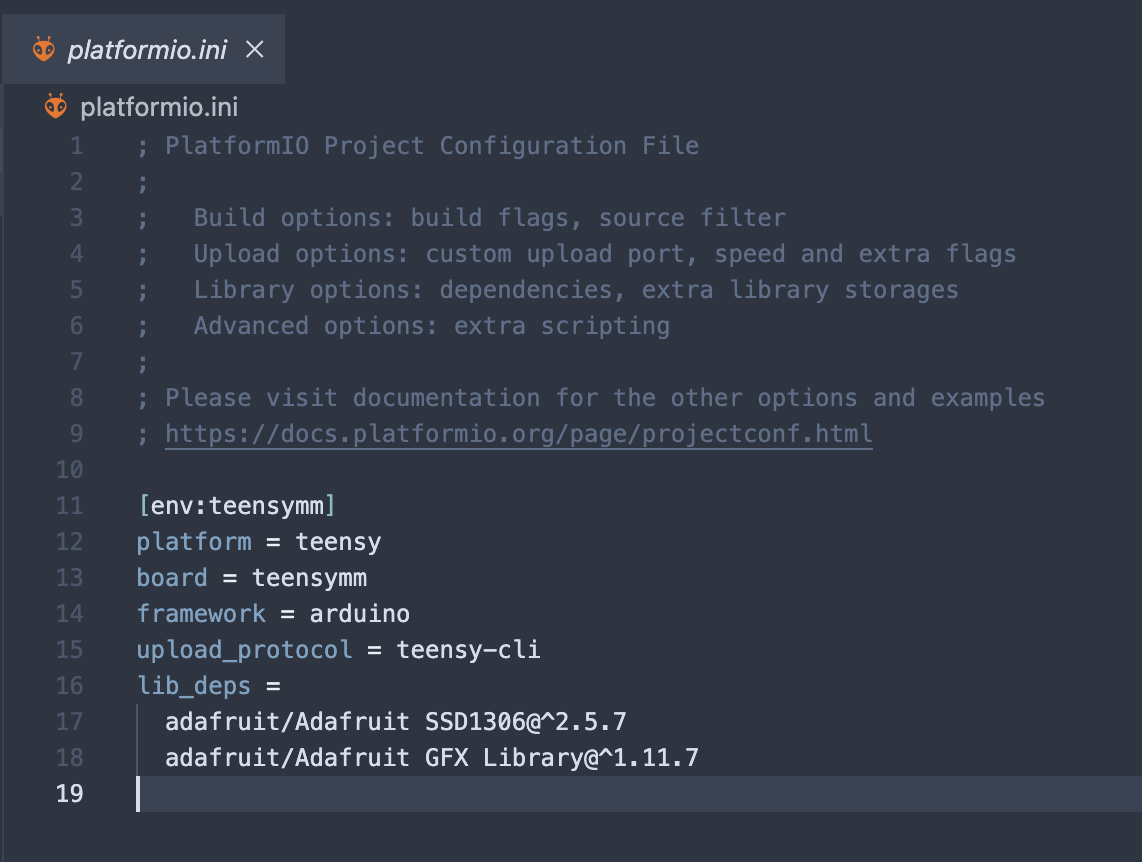
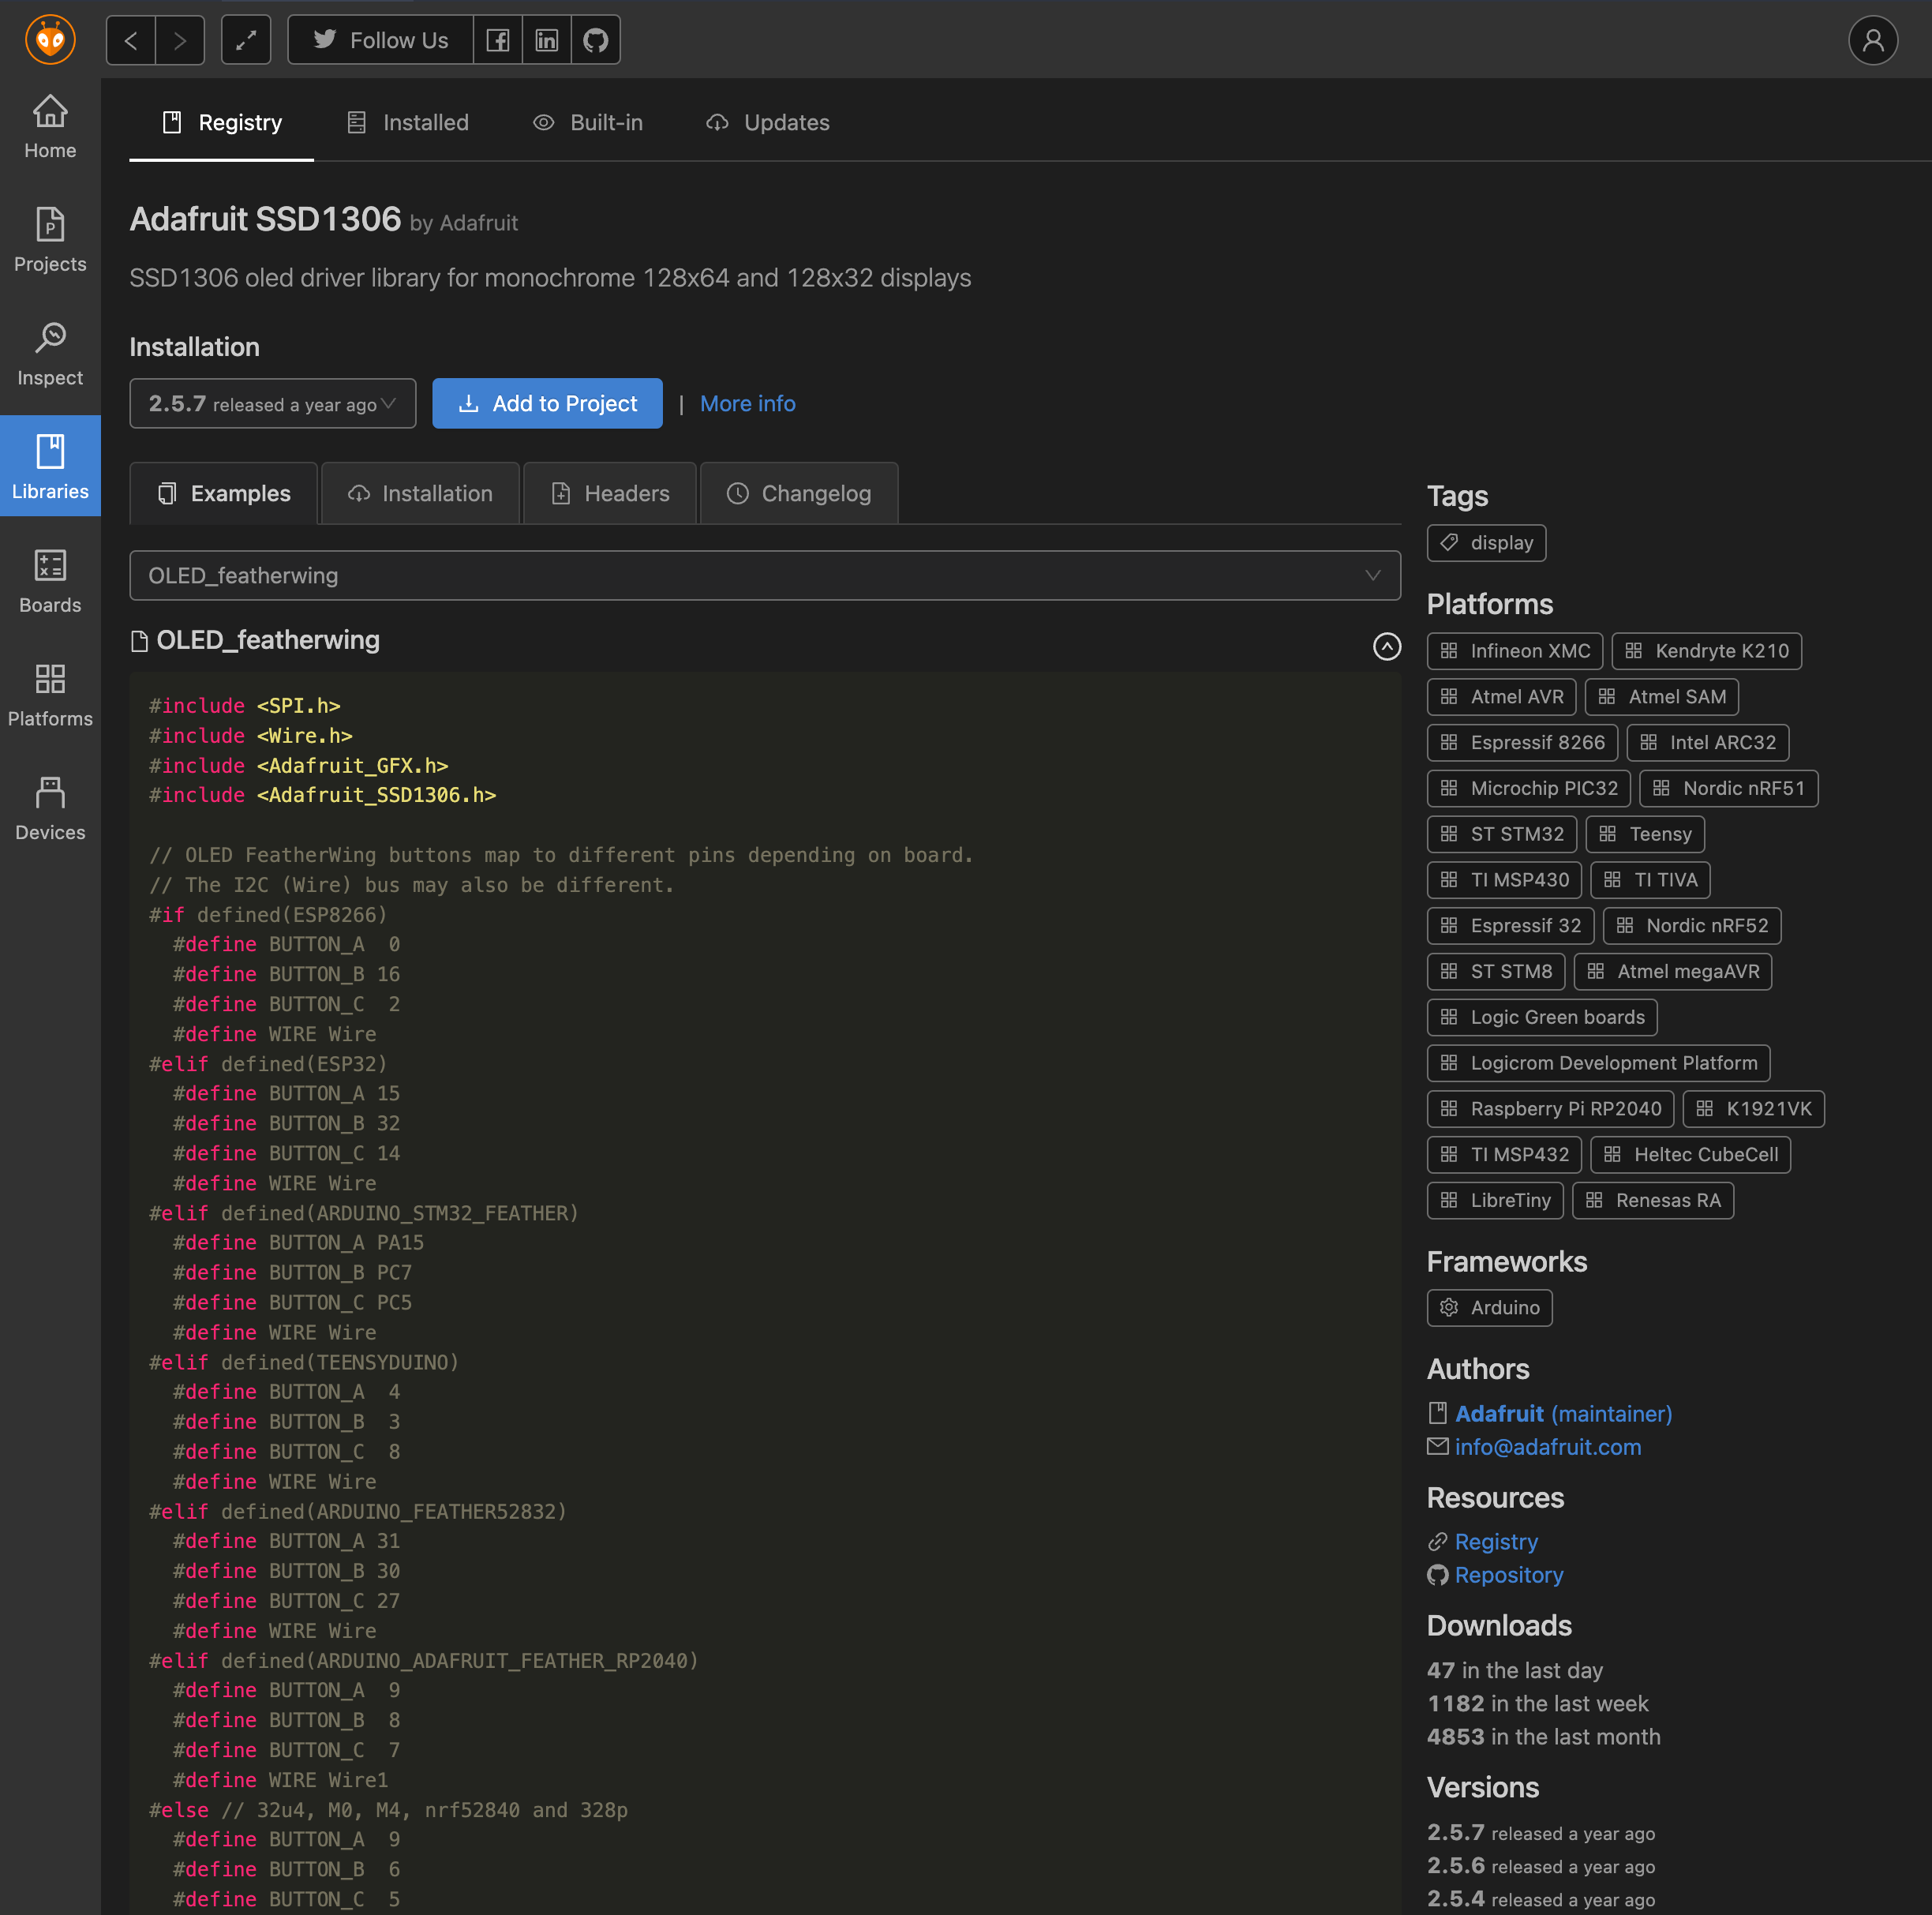
To add a library, you will find a library browser on PIO home tab, where you can choose and select the version of the library you’re interested. Add to project will then install the libary. PlatformIO automatically configures your project, downloads the files and adds the lib_deps line to your project config.
Compared with the Arduino IDE, it may be overwhelming at first, because you may peek into the files before installing, see changelogs etc.
Once all coding is done, go ahead and build the project and upload it to your board by using the buttons on the bottom toolbar.
The Build Button is the checkmark one, the arrow to right is the one to upload it to your board.
Happy coding!